baby!
Category: belly series | August 16th, 2010
since i am still considering myself new to this blogging thing….it makes me feel uber special when someone features me!!! (even if i wasn’t new, i would still feel special!) Michelle, Kim, & Brandy over at Someday Crafts made my day!!

they featured my first home project today! *smiles* y’all should check them out….you will not leave their site without something you want to create. :)

peace and love
xox
i realized my want list is piling up…hmmm

source
i want:
* a haircut (it’s been since february….ha)
* to get enough sleep
* this morning sickness to go away
* to buy lots of baby things :)
* to love coffee again…oh how i miss the need for it (decaf of course)
* a personal chef that will make allll my meals and millions of snacks
* to hang out with husband even more
* to make lots of things that are on my list!
* to hang out with family & friends more
….but then i got to realize that i don’t need all of these things and i don’t want to be selfish. i need to realize the important things in life that i need to want. i am so very blessed for what i have and can be totally content with what i have :) praise God. He has done lots of things in our lives and i have no idea where i’d be without Him.
today is thursday…which means almost friday! eeeek! we’re going camping with the youth tomorrow too! get excited for no sleep…lol have a great day everyone! and be blessed for what you have!!!
ps. husband got an ipad for work and it is sooo addicting. good investment though. :)

source
saw this…and it is pretty awesome. :)
peace and love
xox
happy tuesday everyone! as you can tell i have been slacking on my posts, but jessica is here to save the day! thank you!! her awesome blog over at happy together is super cute and she has created so many great projects. if you haven’t checked it out then go do it! (after reading this post of course) :)

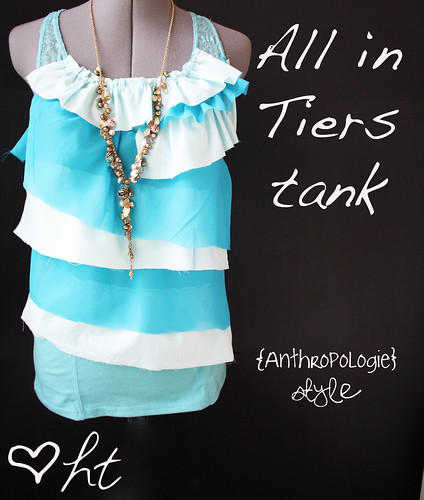
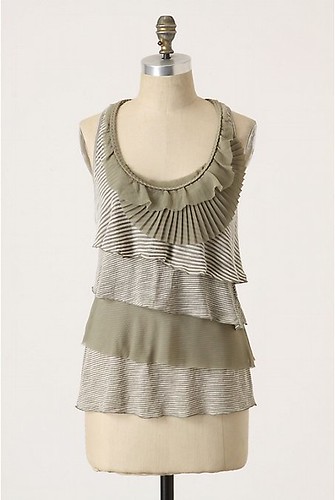
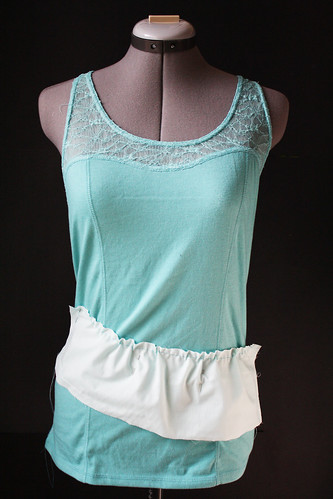
The above picture is a shirt from Anthropologie. It is similar to the one that a reader suggested I do a tutorial for. It’s so cute, why not? I wasn’t able to find any fun knits in time to do this, but as you can see, a lot of fabrics will work. It’s all about the look you are going for.To make this, you will need a knit tank top, some fabric, scissors, pins, measuring tape, and all the sewing stuff. Make sure you use the correct sewing machine needles for the type of fabric you are working with. The following tutorial is just kind of a broad how to, as each persons tank top will be different.
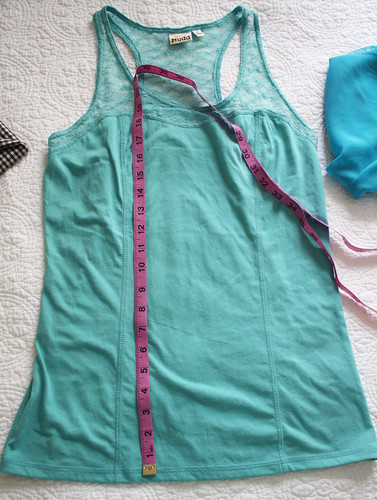
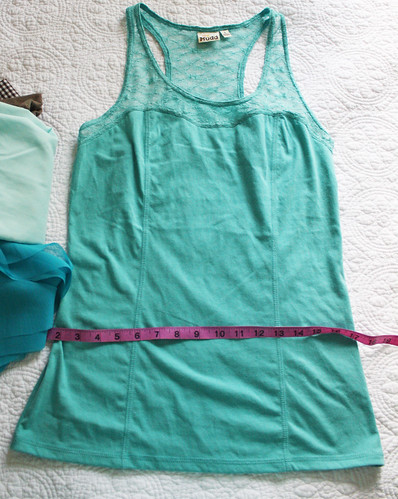
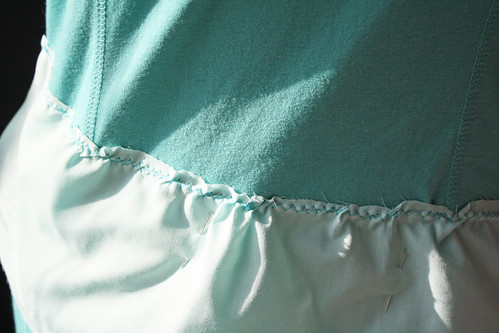
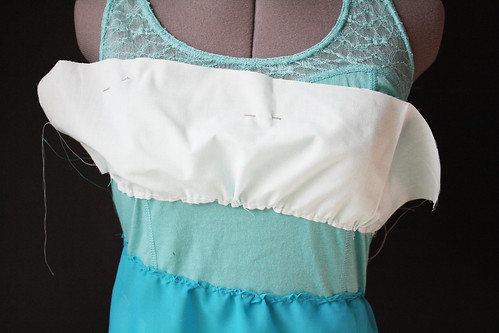
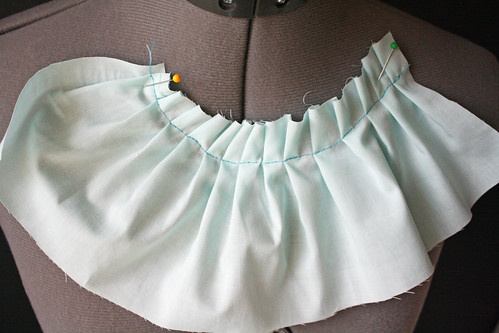
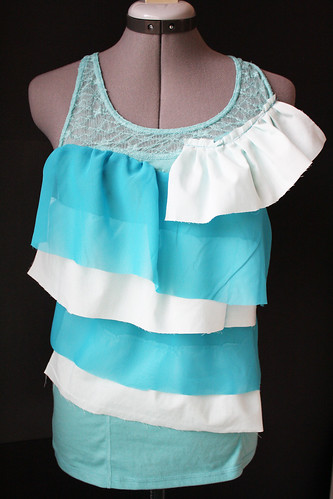
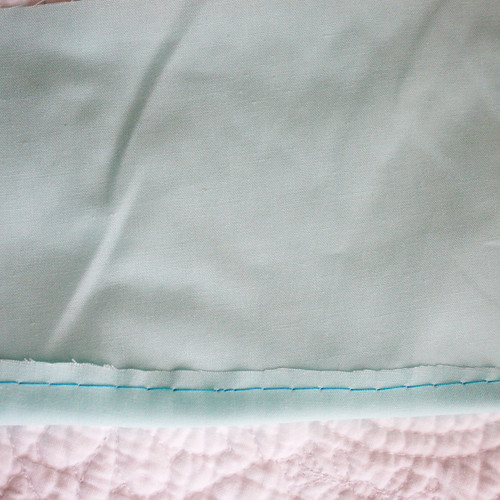
For the neck ruffle, I wanted it to look a bit cleaner, so I folded the top down towards the wrong side of the fabric and sewed in place. Then I basted and gather a little farther down, pinned it on, and sewed it on with a long straight stitch.You can really do some fun things with ruffles and pleats. Use your imagination and have some fun. I’m sorry I don’t have any pics of it on a person, but I’m currently without a photographer to help me out.
i actually had the energy to do a project around the house! there are tons of projects to do but clearly i tackled the bathroom first. actually it was the closet :) which was fun but nothing to post about.

here’s the before pic in the bathroom. i’m an organized person but just didn’t have the time, and husband was not happy about that section. it is right in front of the main mirror in the bathroom so there’s no escaping it’s craziness.


so i made the super long field trip to ikea and bought these simple yet useful canvas organizers. they’re 2 for 3 bucks. i wanted to decorate them somehow since white was a little boring. got some felt and glued the words on them. hair=head bands, wraps, etc. skin=lotions, perfumes, face=face wash, lotion, neck=necklaces, wrist=bracelets….you get the point :)
here’s the after! it’s a lot better than before but not sure if husband likes it. ha. hope everyone has a great day!!! tomorrow is friday. yay!!!
*****update: as of now i have rearranged the bottom shelf with the meds and stuff since Penny pants can now get into everything. so yes…those who have small children, think about the reachable shelves. ;)
peace and love
xox