guest post~DIY pleated headband
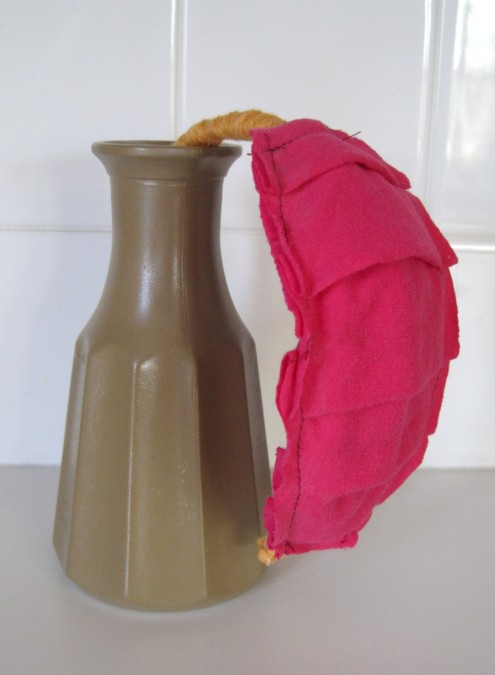
Category: DIY | April 18th, 2011Hi guys! I’m Alyssa from Live. Love. Craft., my blog where I blog about the crafts I do and other fun things! Come stop by and say ‘Hi’ sometime! I am so excited to be here blogging today! Kristen was so sweet to ask me to do a guest post! I feel so honored! Today my tutorial is for a cute, pleated headband made from an old shirt! Enjoy!
Supplies:
Hot glue gun
Scissors
Old tee or fabric
Headband (I buy mine at the dollar store.)
Felt scrap
Yarn
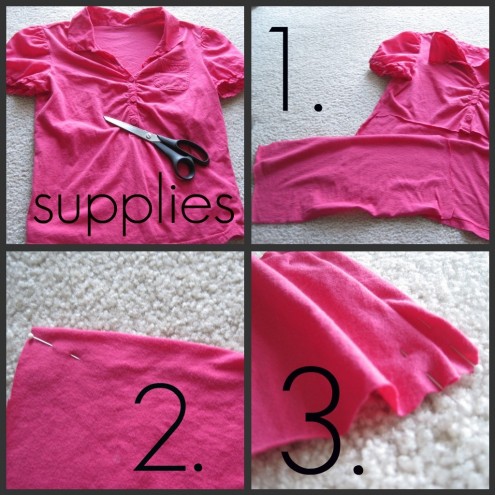
1. Cut a rectangle out of your shirt (or whatever fabric you are using.)
2. Fold one of the short ends over and pin.
3. and 4. Make a pleat
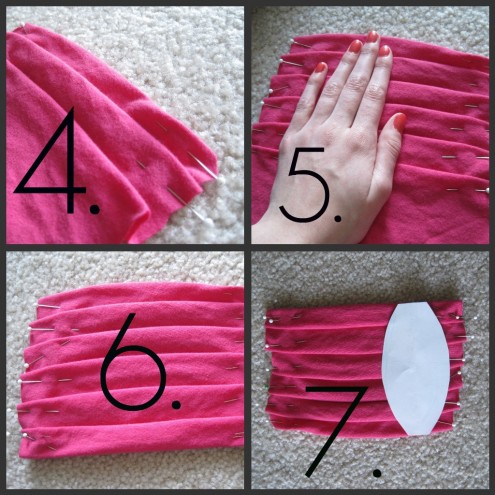
5. Continue making pleats all the way down pinning each pleat. Make sure they are all the same size!
6. Once you reach about 3.5 inches, fold the end under and pin
7. Draw out a shape on paper and cut it out
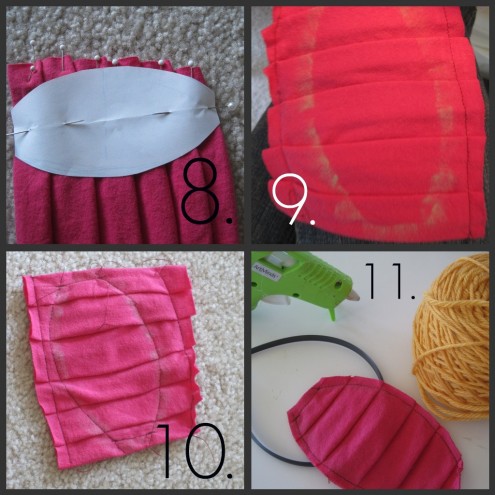
8. Pin template down.
9. Trace around it with chalk.
10. Sew along your lines.
11. Get your hot glue gun heatin’ up and get out your headband, yarn, and felt.
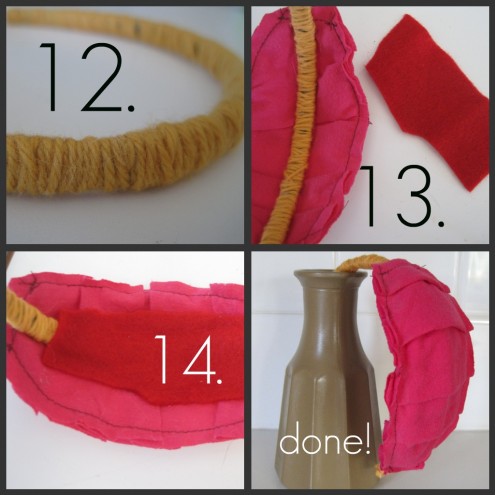
12. Glue yarn around your headband making sure to cover the whole thing.
13. Glue pleated piece on.
14. Glue some felt on the back to secure and you’re good to go!

Now you can wear your headband proudly, and when someone asks where you got it, you can say proudly, “I made it!”
Thank you for reading!