guest blogger~Adventures in Dressmaking!!!
Category: DIY | June 29th, 2010i am so excited to share with you my FIRST ever guest blogger!!! my new friend Suzannah from Adventures in Dressmaking was kind enough to be my guest. as you may know from previous posts i have been out of it lately with being pregnant and trying to move into a new house. whew! i am sure you will enjoy Suzannah and all her talents just as much as i do!!!! enjoy!!!
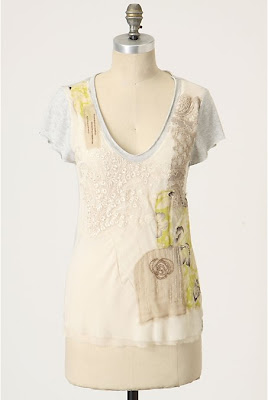
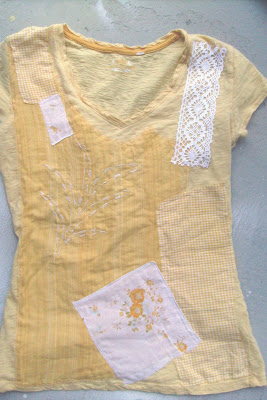
Hello there, readers at Peace, Love,& Crafts! I’m Suzannah, and I blog at at Adventures in Dressmaking, where I share my sewing, crafty, and home decor projects almost daily! Kristen asked me to do a guest post today and, in the spirit of the coming warm weather, I thought I’d share a couple of my fave summer wardrobe tutorials with you!It’s just now starting to get warm here in Oregon and just today I had a hard time getting dressed… it’s definitely time for some of us to add to the old winter/spring basics and create some cute new pieces, but of course I’m always interested in saving money and revamping existing pieces, so I like to sew new things rather than buy! First off, let me share with you a tutorial on how to make a cute patchwork-look tee like one from Anthropologie. You’ll need a basic tee (I used a ring spun v-neck) and some scraps–I chose a vintage hankie,some lace, and some scraps from a men’s dress shirt refashion I did a while ago! Here’s the inspiration:
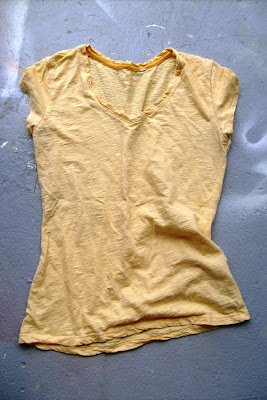
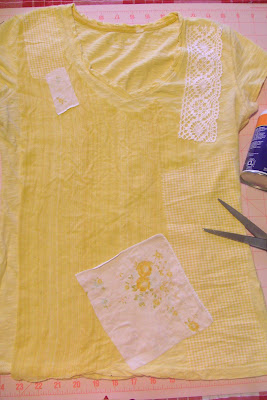
- Start with your tee. I got this one at the Goodwill outlet when I was collecting yellow things–it’s a Kohl’s brand. I think I wore it to paint in and it has a smudge of black high-gloss paint on the front! I wish I had had a paler one like the Anthropologie v-neck, in a neutral color or something, but this will have to do.
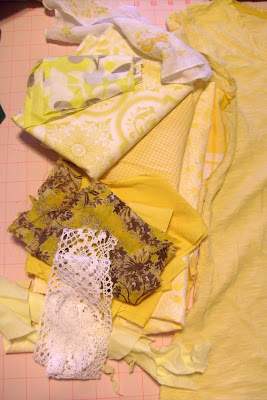
- Now pull out all your pretty scraps and trims that you think capture the look of the Anthro one. I pulled out all the yellowy ones and some heavy cotton lace.
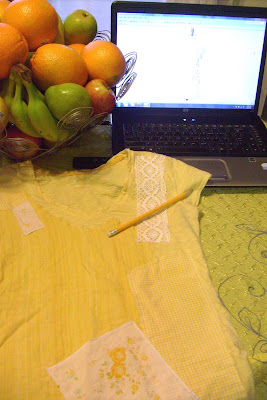
- Lay out the pieces as you’d like them to be. I like to do this with my computer right behind my work so I can glance up a lot and look at what I’m copying!

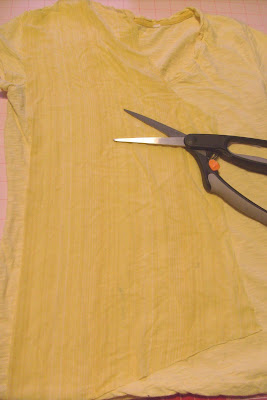
- Use spray adhesive to keep all the fabric pieces in place. If you don’t have any spray adhesive, you could use pins, but this would be a serious pain in the neck. I laid out the big piece that comes all the way up the right side first and cut away at the neck.
Then add everything else with more adhesive…
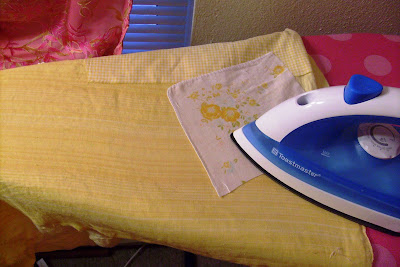
- Press the pieces down carefully–watch out for melting and unsticking the spray adhesive.
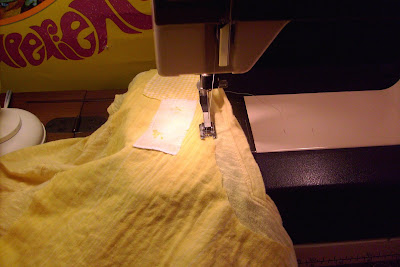
- Sew down the pieces. I used a zig zag stitch for most of them, but a straight stitch on the finished edges of the hankie I used and on the very high quality, tightly woven shirt pieces (the gingham).
- Back to the computer, look at the inspiration and copy the embroidery pattern onto the shirt with a pencil or fabric marker. I really wish I had a fabric marker in times like these…
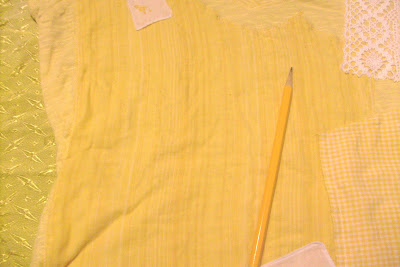
Can you just barely see the pencil marks I made?
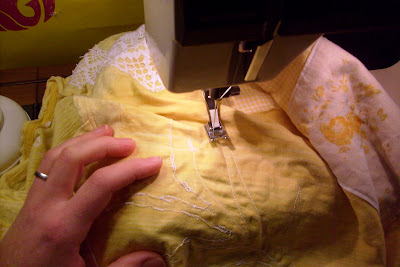
- Using a thick thread, sew over your lines either by machine or by hand. I used a heavy Coats and Clark cotton thread in off-white, which was not super easy to sew with, but which left very clearly visible stitches like the original has.
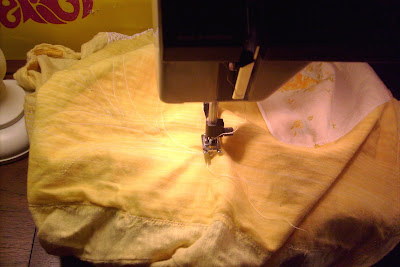
- This part is optional, and not necessary if you’re new to sewing or unsure of your machine. I used a buttonhole stitch to make little round-ish spots on the branch–the Anthro version has some fancier detail but this is my simplified version. Some of them are just a row of buttonhole stitch, some are buttonhole, double back, more buttonhole next to the first.
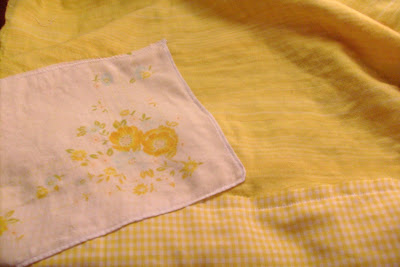
- Next, clean up all the threads–trim lots of threads off the tree thing.
- That’s it! Maybe give it an extra press, but it should be done!
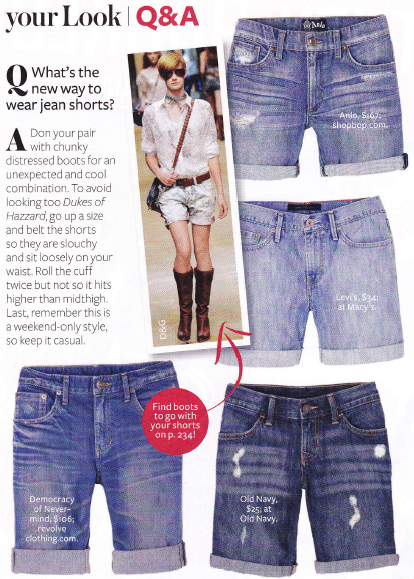
Easy, right?*Originally posted on Adventures in Dressmaking here* To go with your cute and funky embellished tee, I recommend some shorts! Luckily for those of us with an inner thing consciousness,longer, cuffed-hem jean shorts are soooo in this year. I’ve seen them in InStyle, Lucky, People Style Watch, Cosmo (ick), and Glamour. Here’s a page from my InStyle with quite a few choices to get the look, prices ranging from $25-$167. I’ve seen them at Target even., not too expensive, but it’s much more eco-friendly to make some out of jeans from your closet! I like that they’re cute and trendy but not short-shorts,not too snug, and not the kind that you have to keep tugging down your inner thighs.
Of course we need to learn to make these ourselves!!I set out to make a pair and have written up a tutorial for you. Here’s how to make some longish denim shorts yourself!
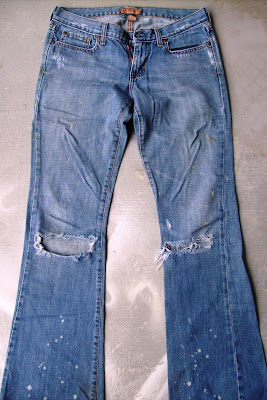
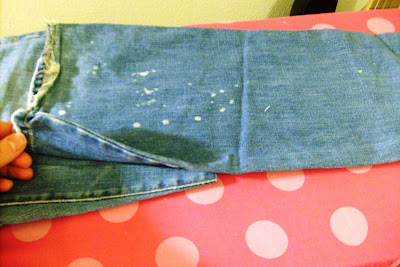
- Start with a pair of loose-ish jeans–snug ones would work, but the look is a little bit softer. I think jeans with or without stretch would work, but mine are 100% cotton. Suuuuper old Abercrombie ones, from Goodwill Outlet, the holes are kind of beyond mend-able.
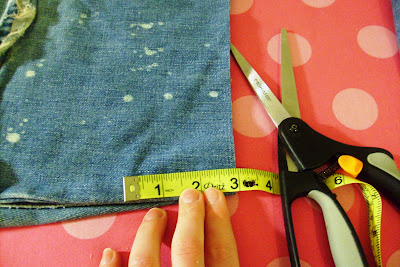
- Figure out how long you want your jean shorts to be. I wanted mine about 12″ from the center of the inseam, including a 2″ cuff.
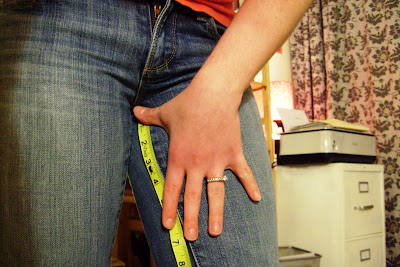
- Cut! Leave a 1/2″ seam allowance, so 12.5″ from the crotch.

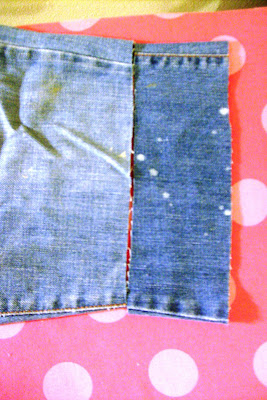
- Now, you can’t just fold the jeans back and cuff them, like you do rolling up jeans to capri them. They taper as they go down the thigh,so they’re several inches smaller in circumference as you get closer to the knee. It would not work to just fold it back. So, take the flared part of the jeans and flip them around 180. Find the part that’s the same circumference as the end of the jeans.
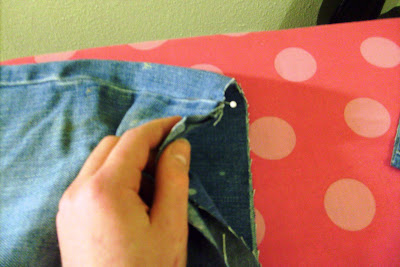
- Turn the cuff piece back 180 again. The shape will be like an hourglass, and you’ll be switching the inseam and outside leg seams. See the top stitched side is on top on the cuff piece, but on the inseam on the main piece?
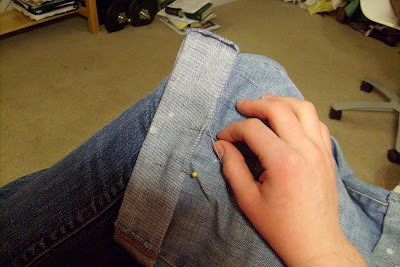
- Flip the cuff piece inside out inside the main piece, and pin.
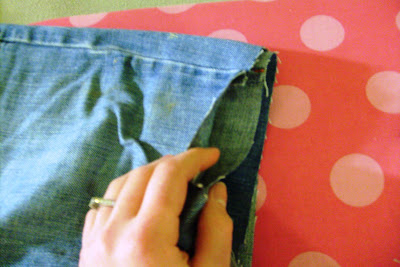
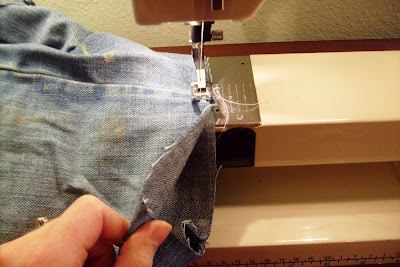
- Sew with a 1/2″ seam allowance.
- Press under 1/2″ hem.
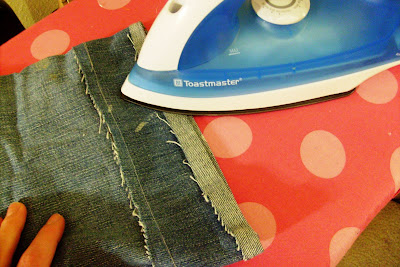
- Press the seam allowance from the two pieces toward the added cuff piece(no pic, but do it the opposite of the picture above).
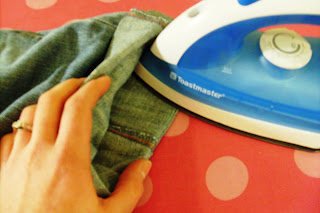
- Fold the cuff piece back and press so that the seam is just under the center of the fold, hidden by like 1/8″.
- Hand-sew the hem down using a hidden whip-stitch, all around on both legs. I used minimal pinning to keep the 1/2″ turn under in place.
- That’s it!!
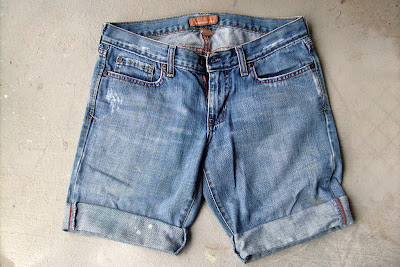
The whole process is more complicated than just turning under a hem, but trust me, it works soooo much better!*Originally posted on Adventures in Dressmaking here* Well, what do you think? Are you all ready to dig up some old clothes from your closet and summer-ify them? I hope so!For more ideas on sewing, home dec, and clothing refashions, I hope you’ll check out my blog at Adventures in Dressmaking. Thanks so much for reading, and thanks for Kristen for hosting this guest post!